This entry is intended to show how to create an EC2 instance from within a Virtual Private Network.
What is a VPC?
Virtual Private Cloud is a full data center in AWS. What this means is that you have control of the servers, storage and networking. AWS VPS allows you to section off a piece of the AWS infrastructure in order to build your own ecosystem. The ecosystem can be made of a series of public and private subnets. A subnet is sort of like a container where you can store your servers.
Why VPC?
In the long run, a VPC will give you more control over how you manage your web servers. For example, suppose you want your Apache webserver to face the public internet (Port 80) but you want your MySQL database quarantined and not running next to Apache (in case there are any bad actors), you can place your Apache web server within a public subnet and MySQL within your private subnet.
These subnets can only be introduced if you have a Virtual Private Cloud.
Step 1 - Select a Server Stack
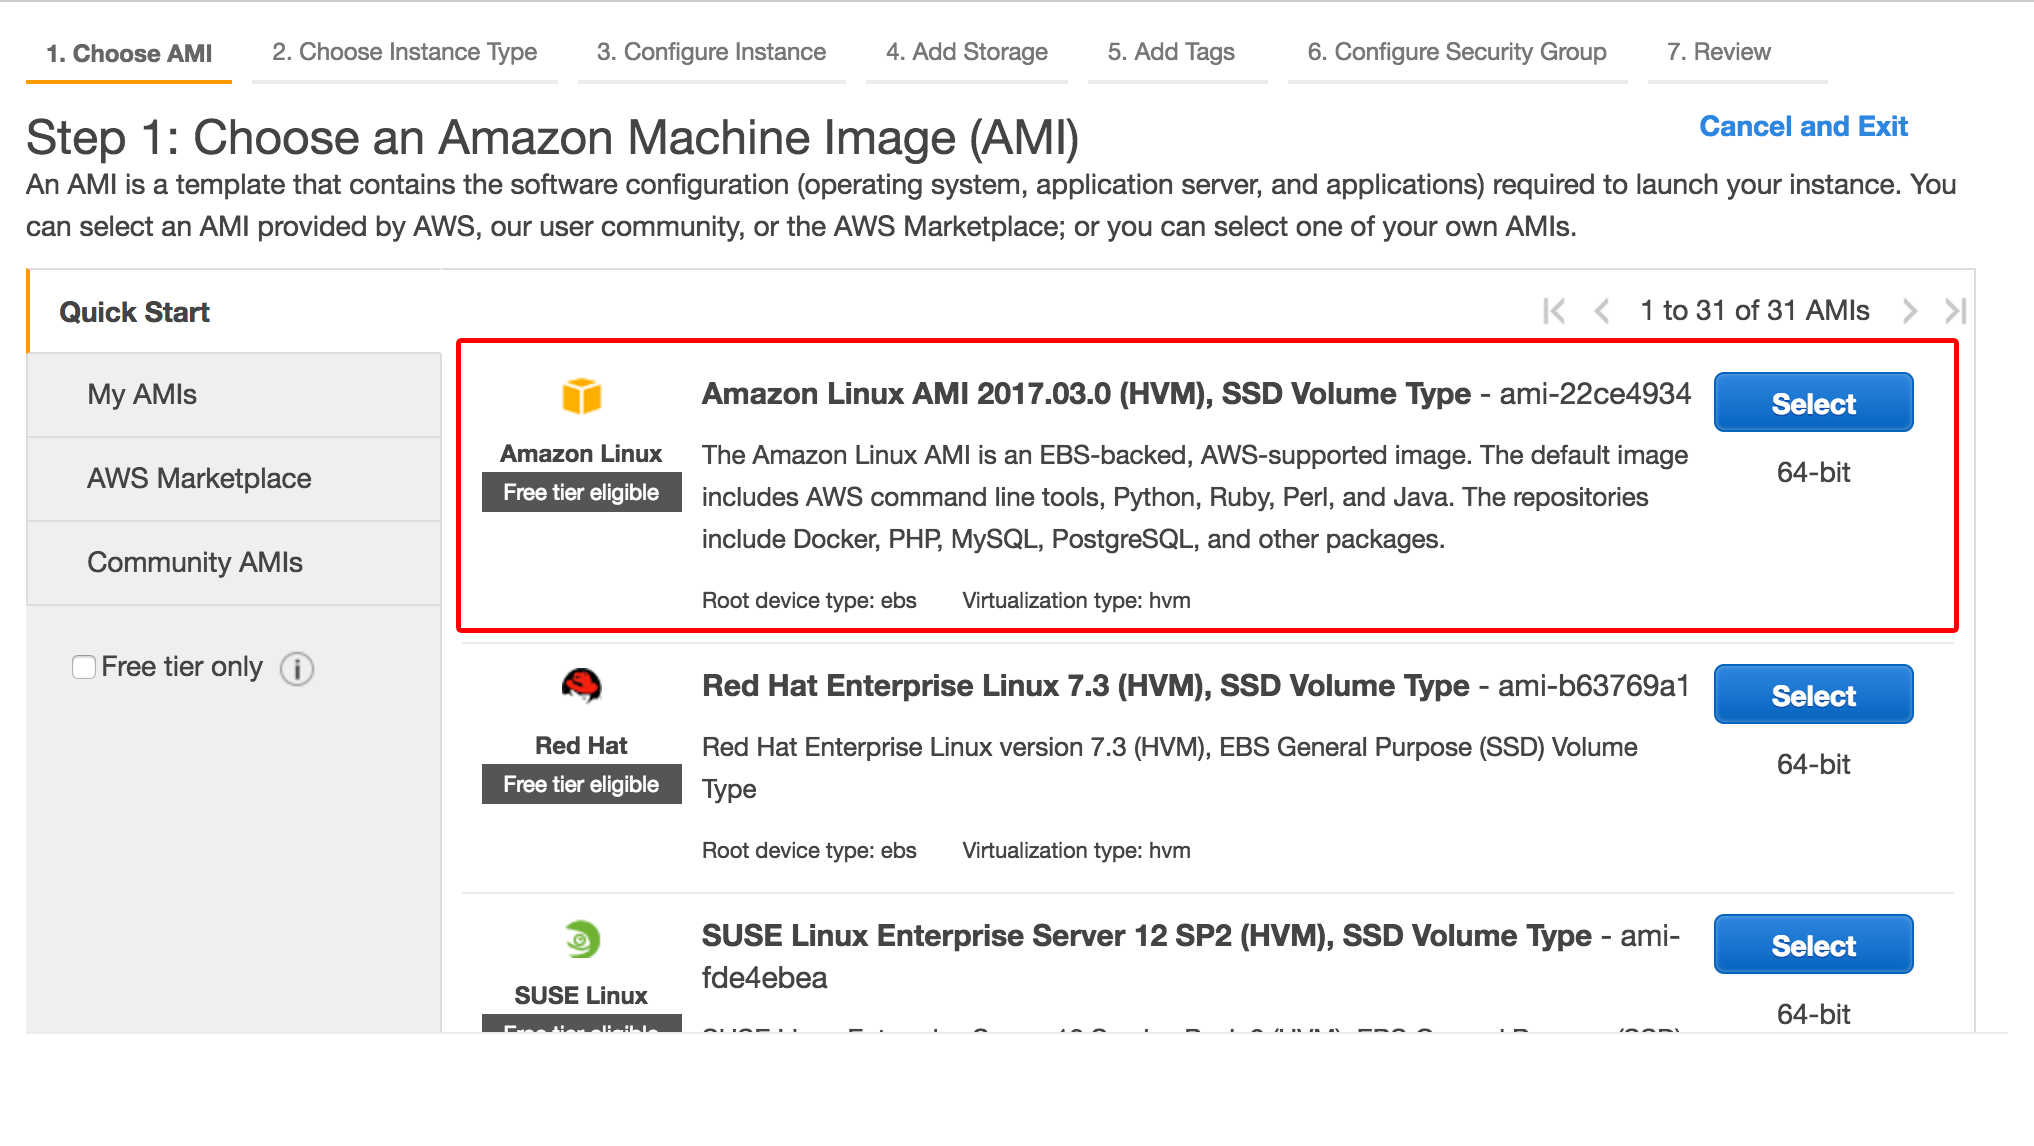
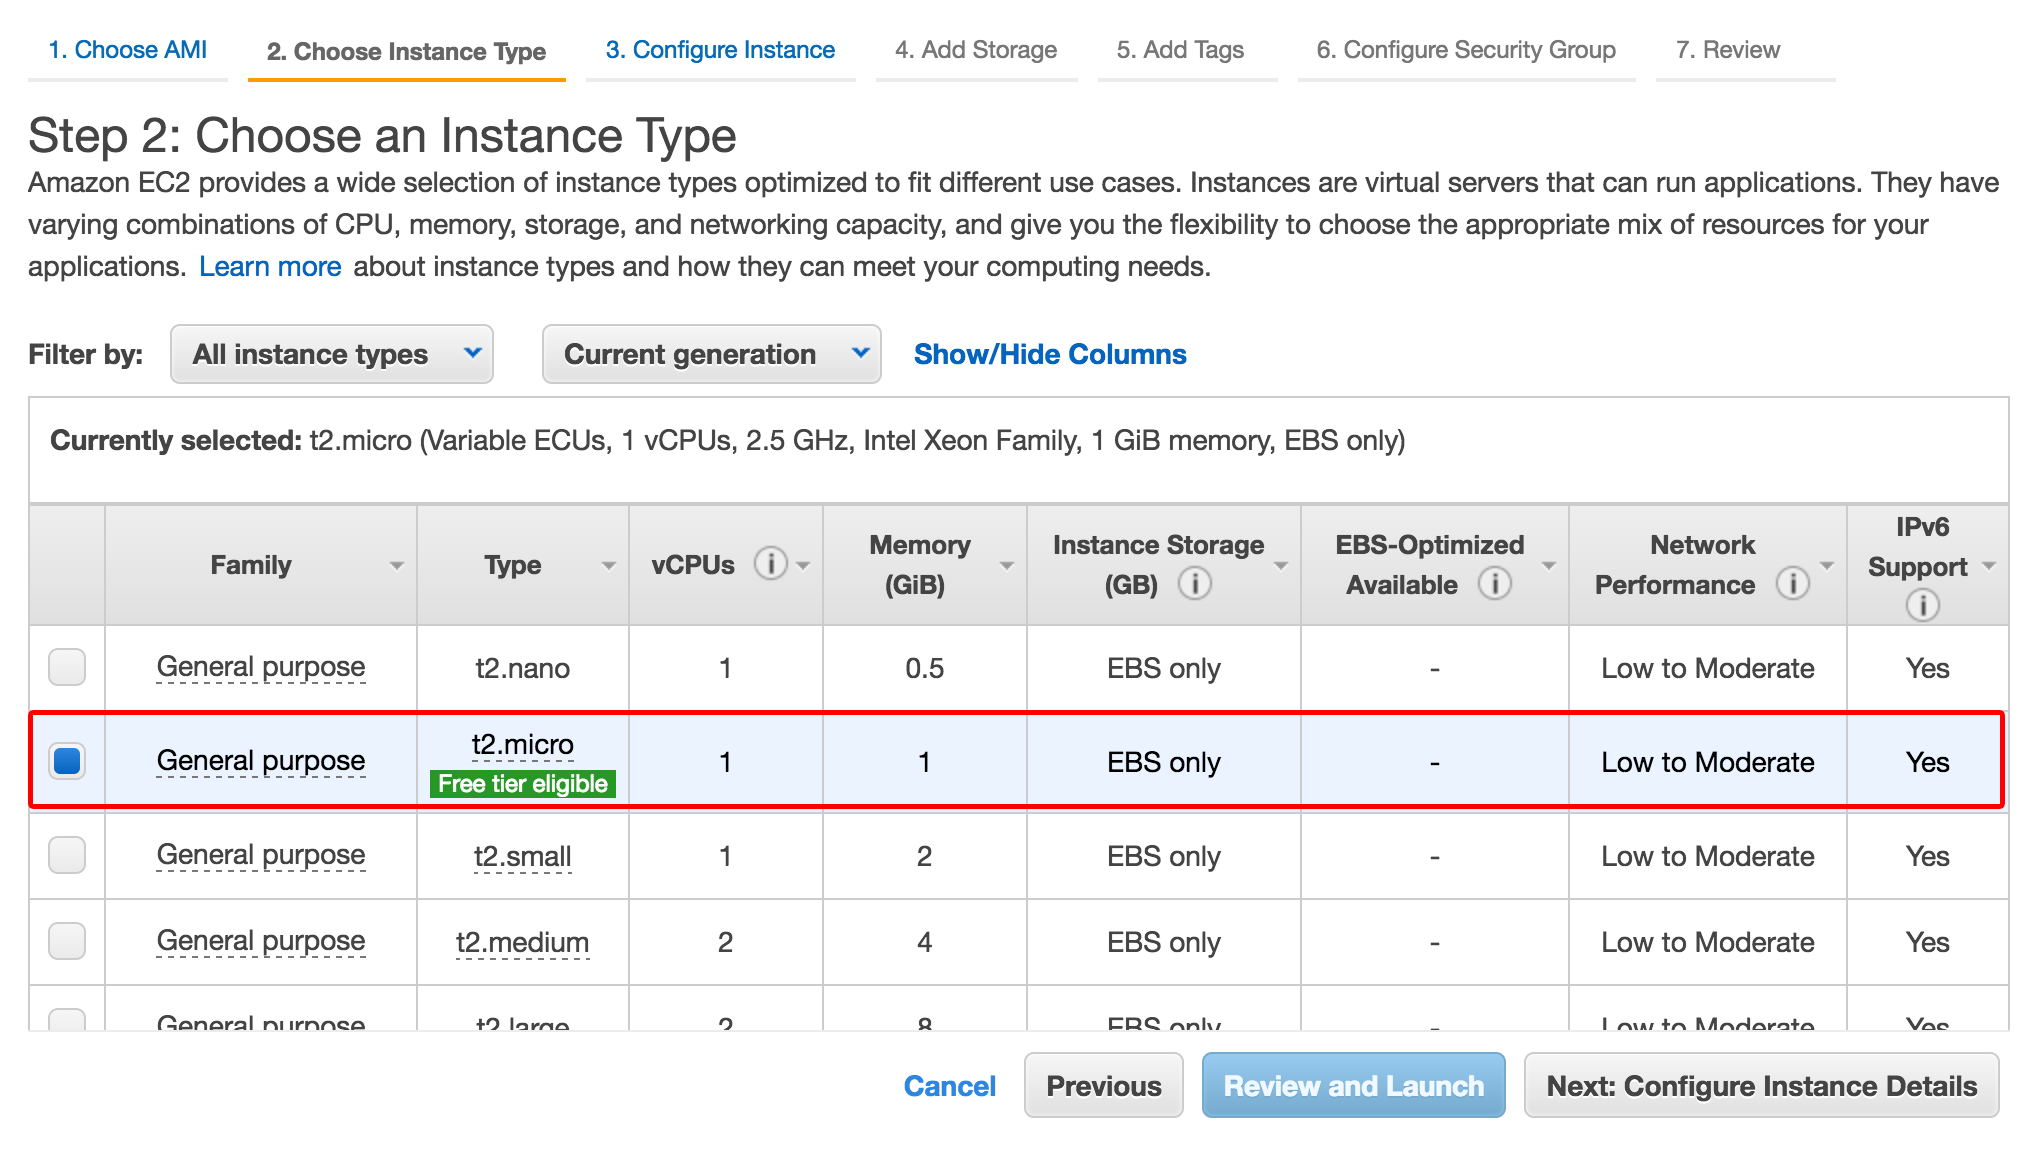
Step 2 - Select an Instance Type
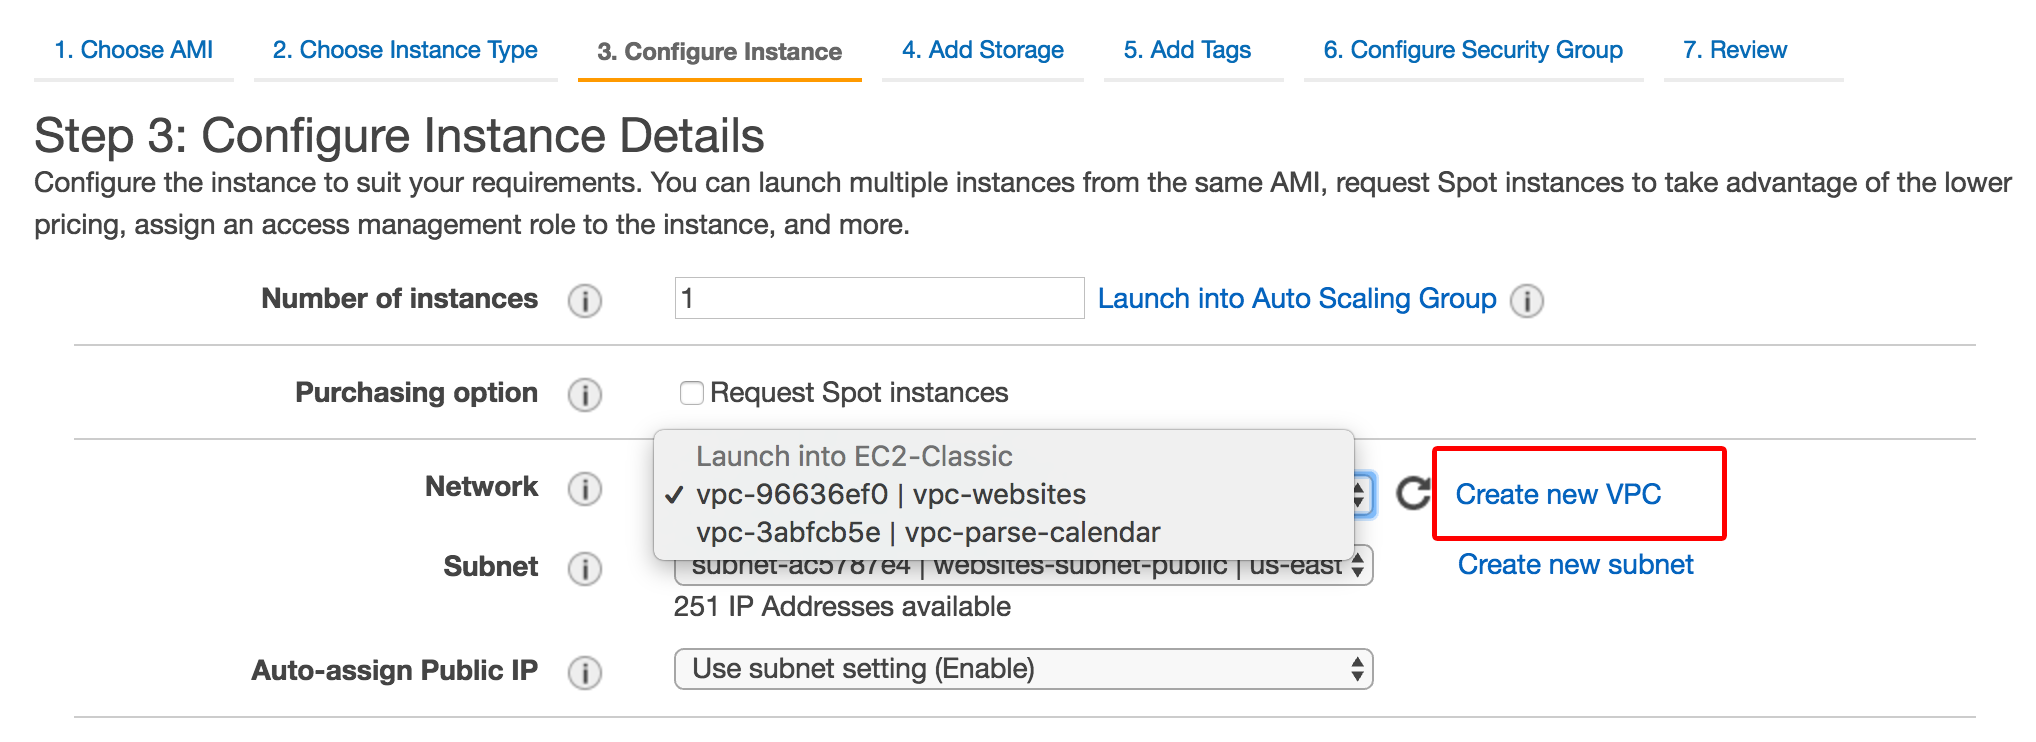
Step 3 - Select Create a new VPC
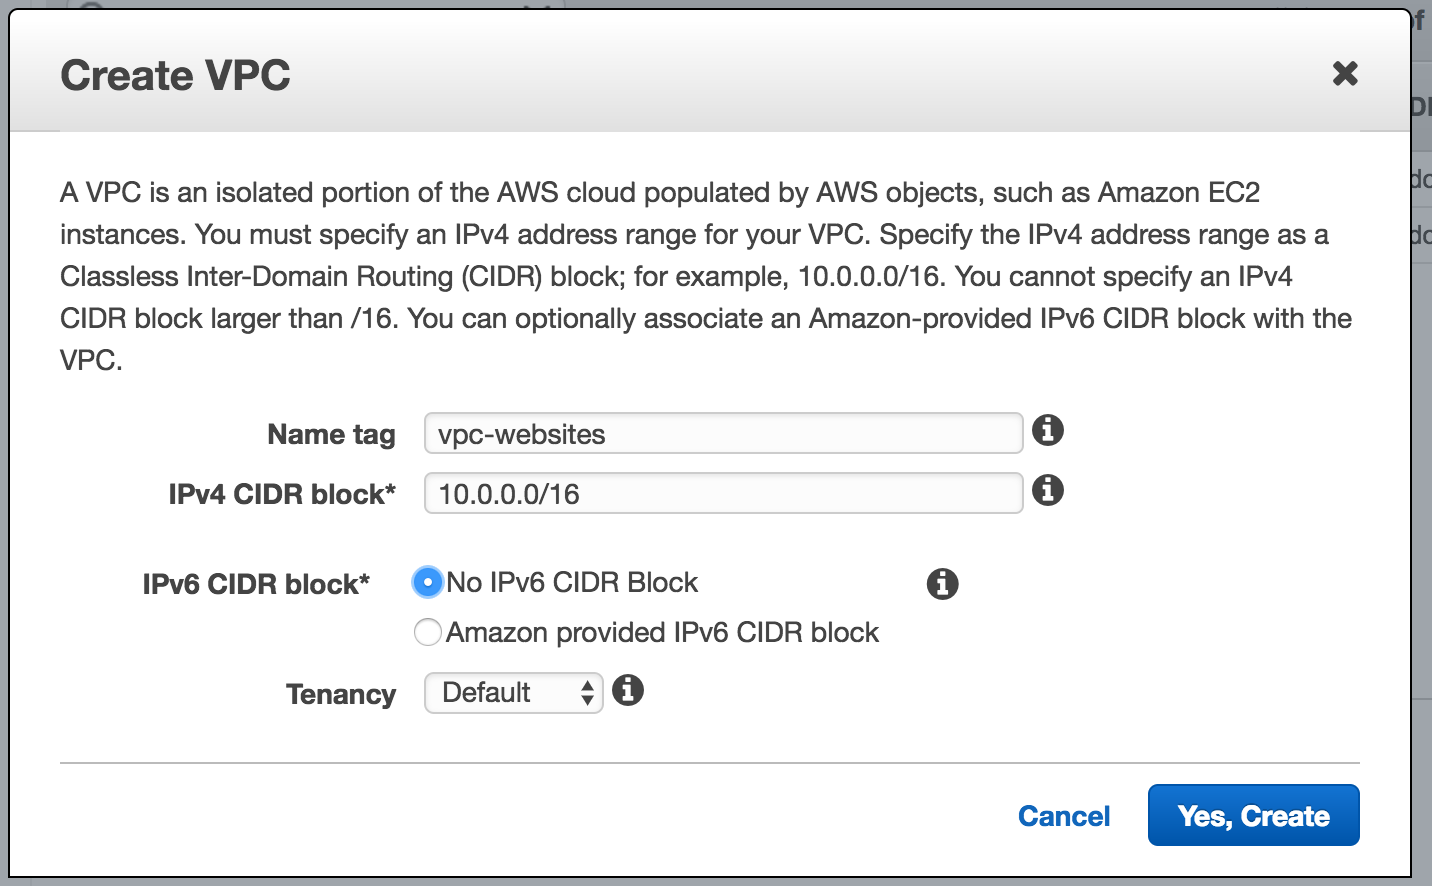
Step 4 - Create a VPC
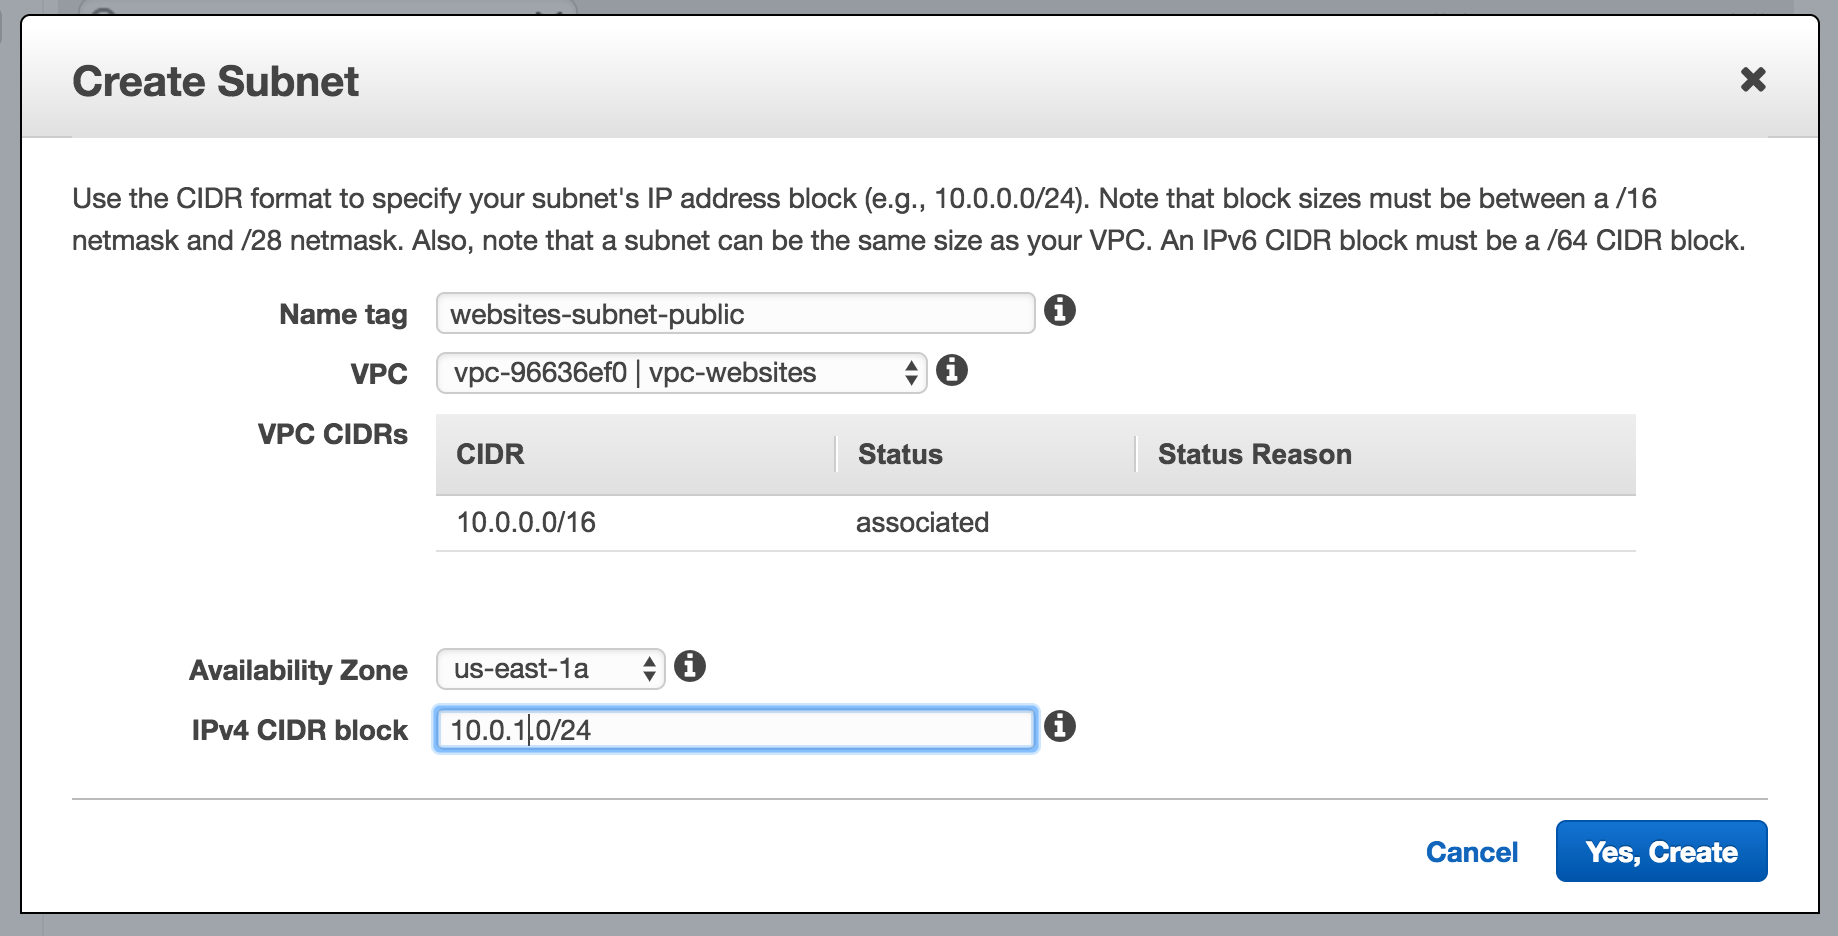
Step 5 - Create a Public Subnet
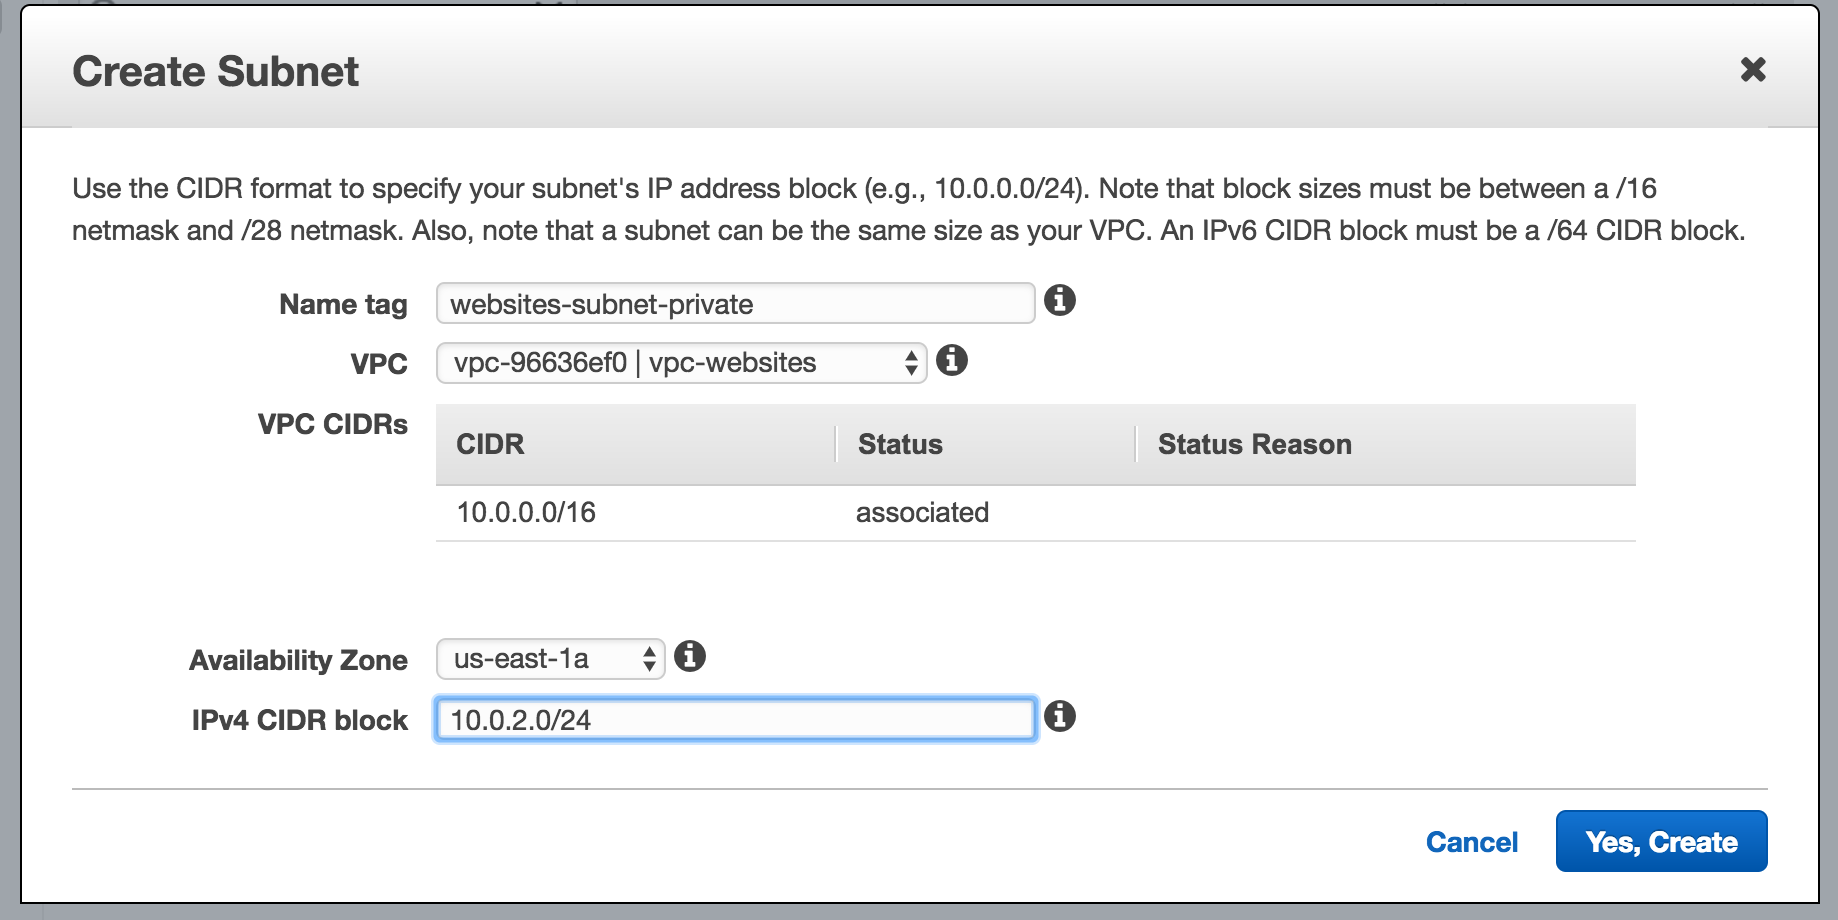
Step 6 - Create a Private Subnet
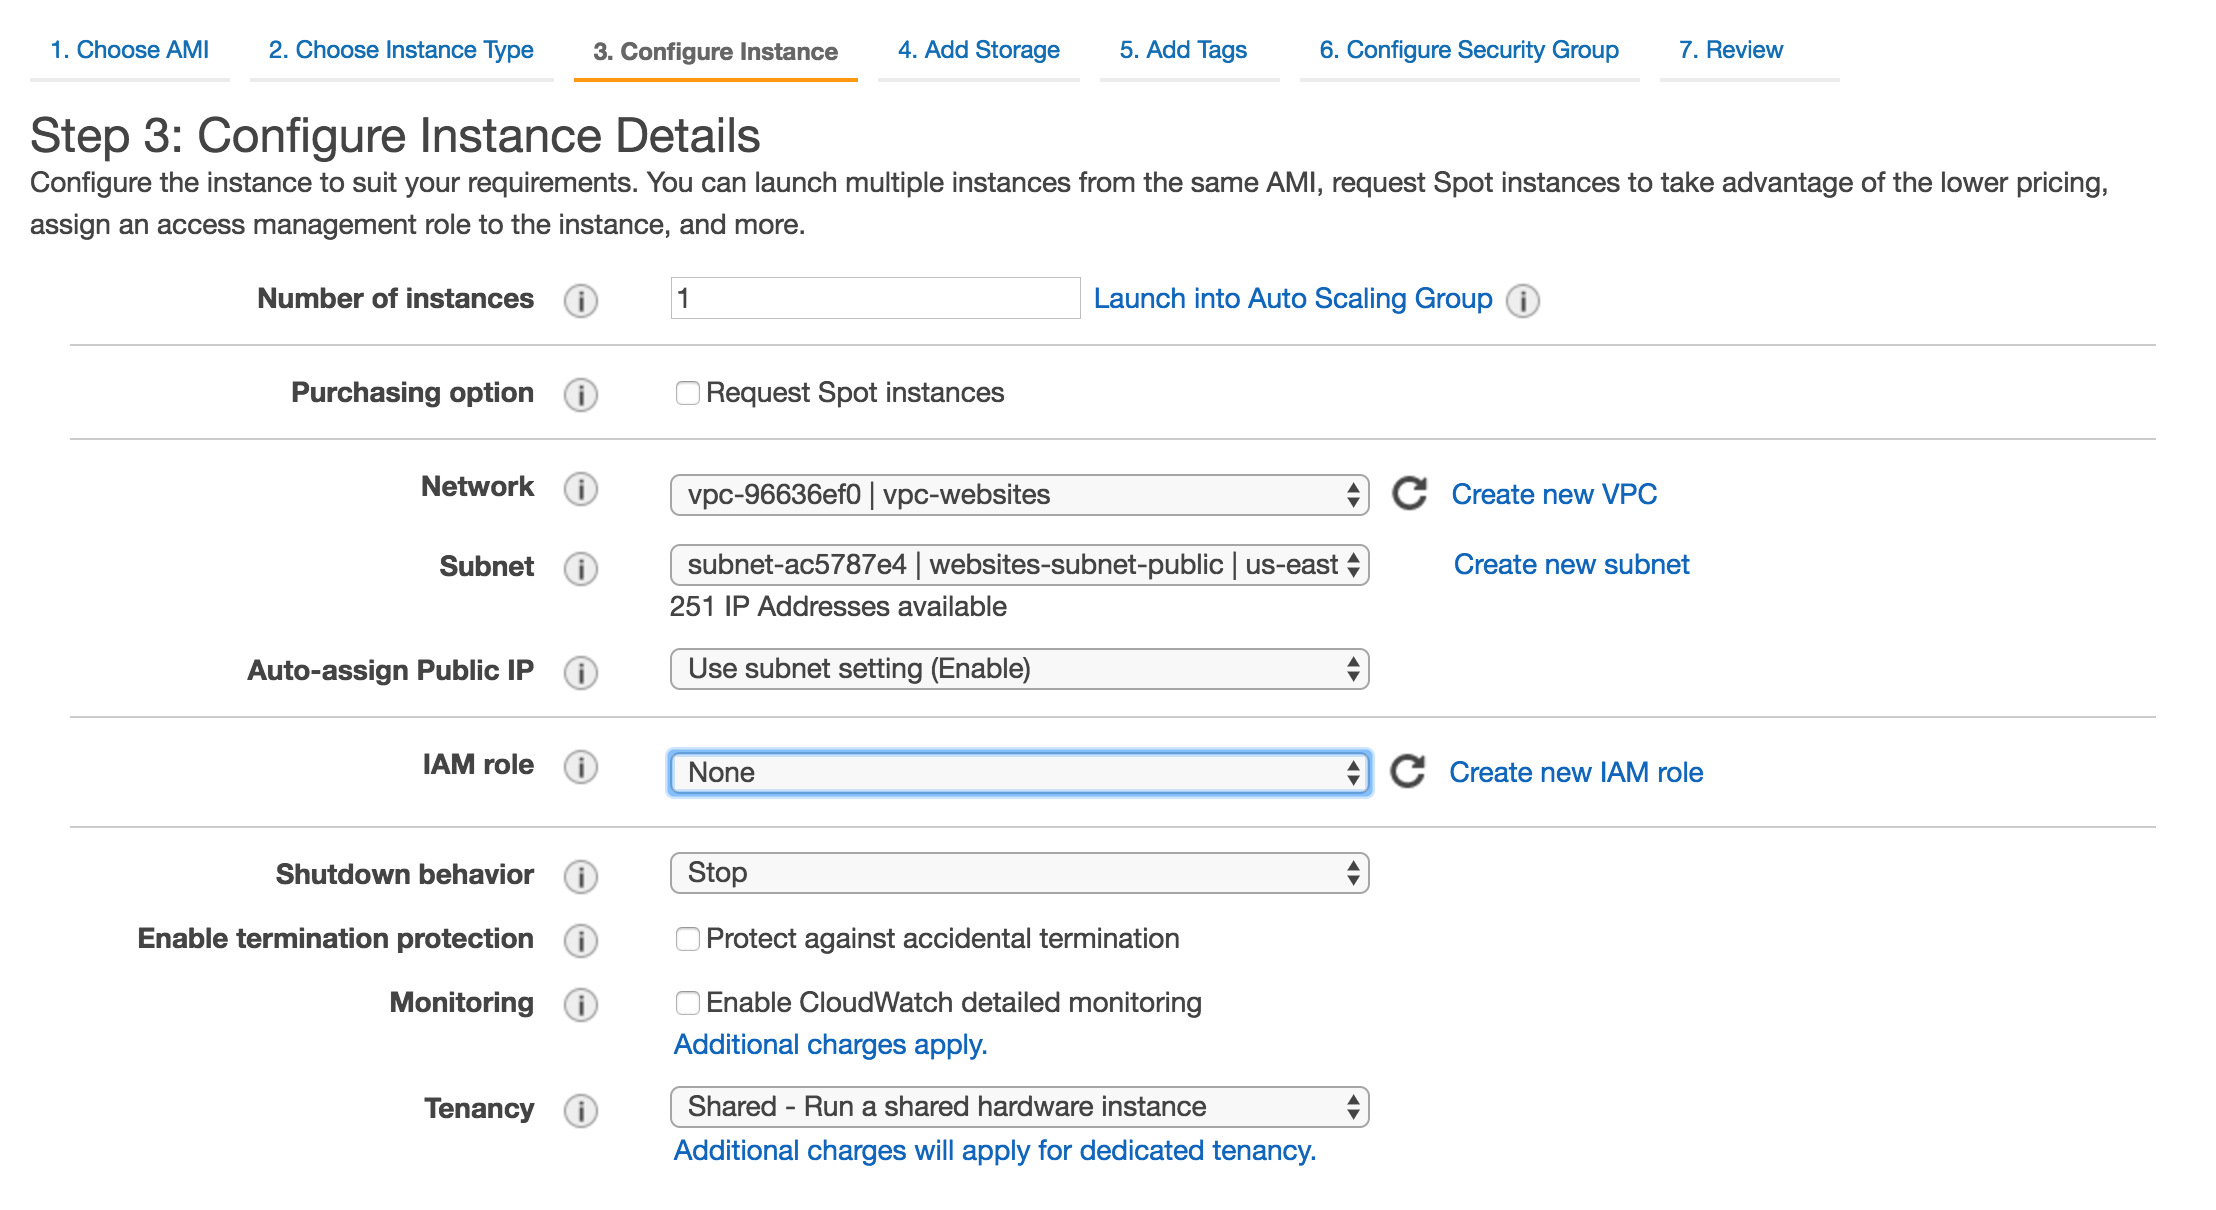
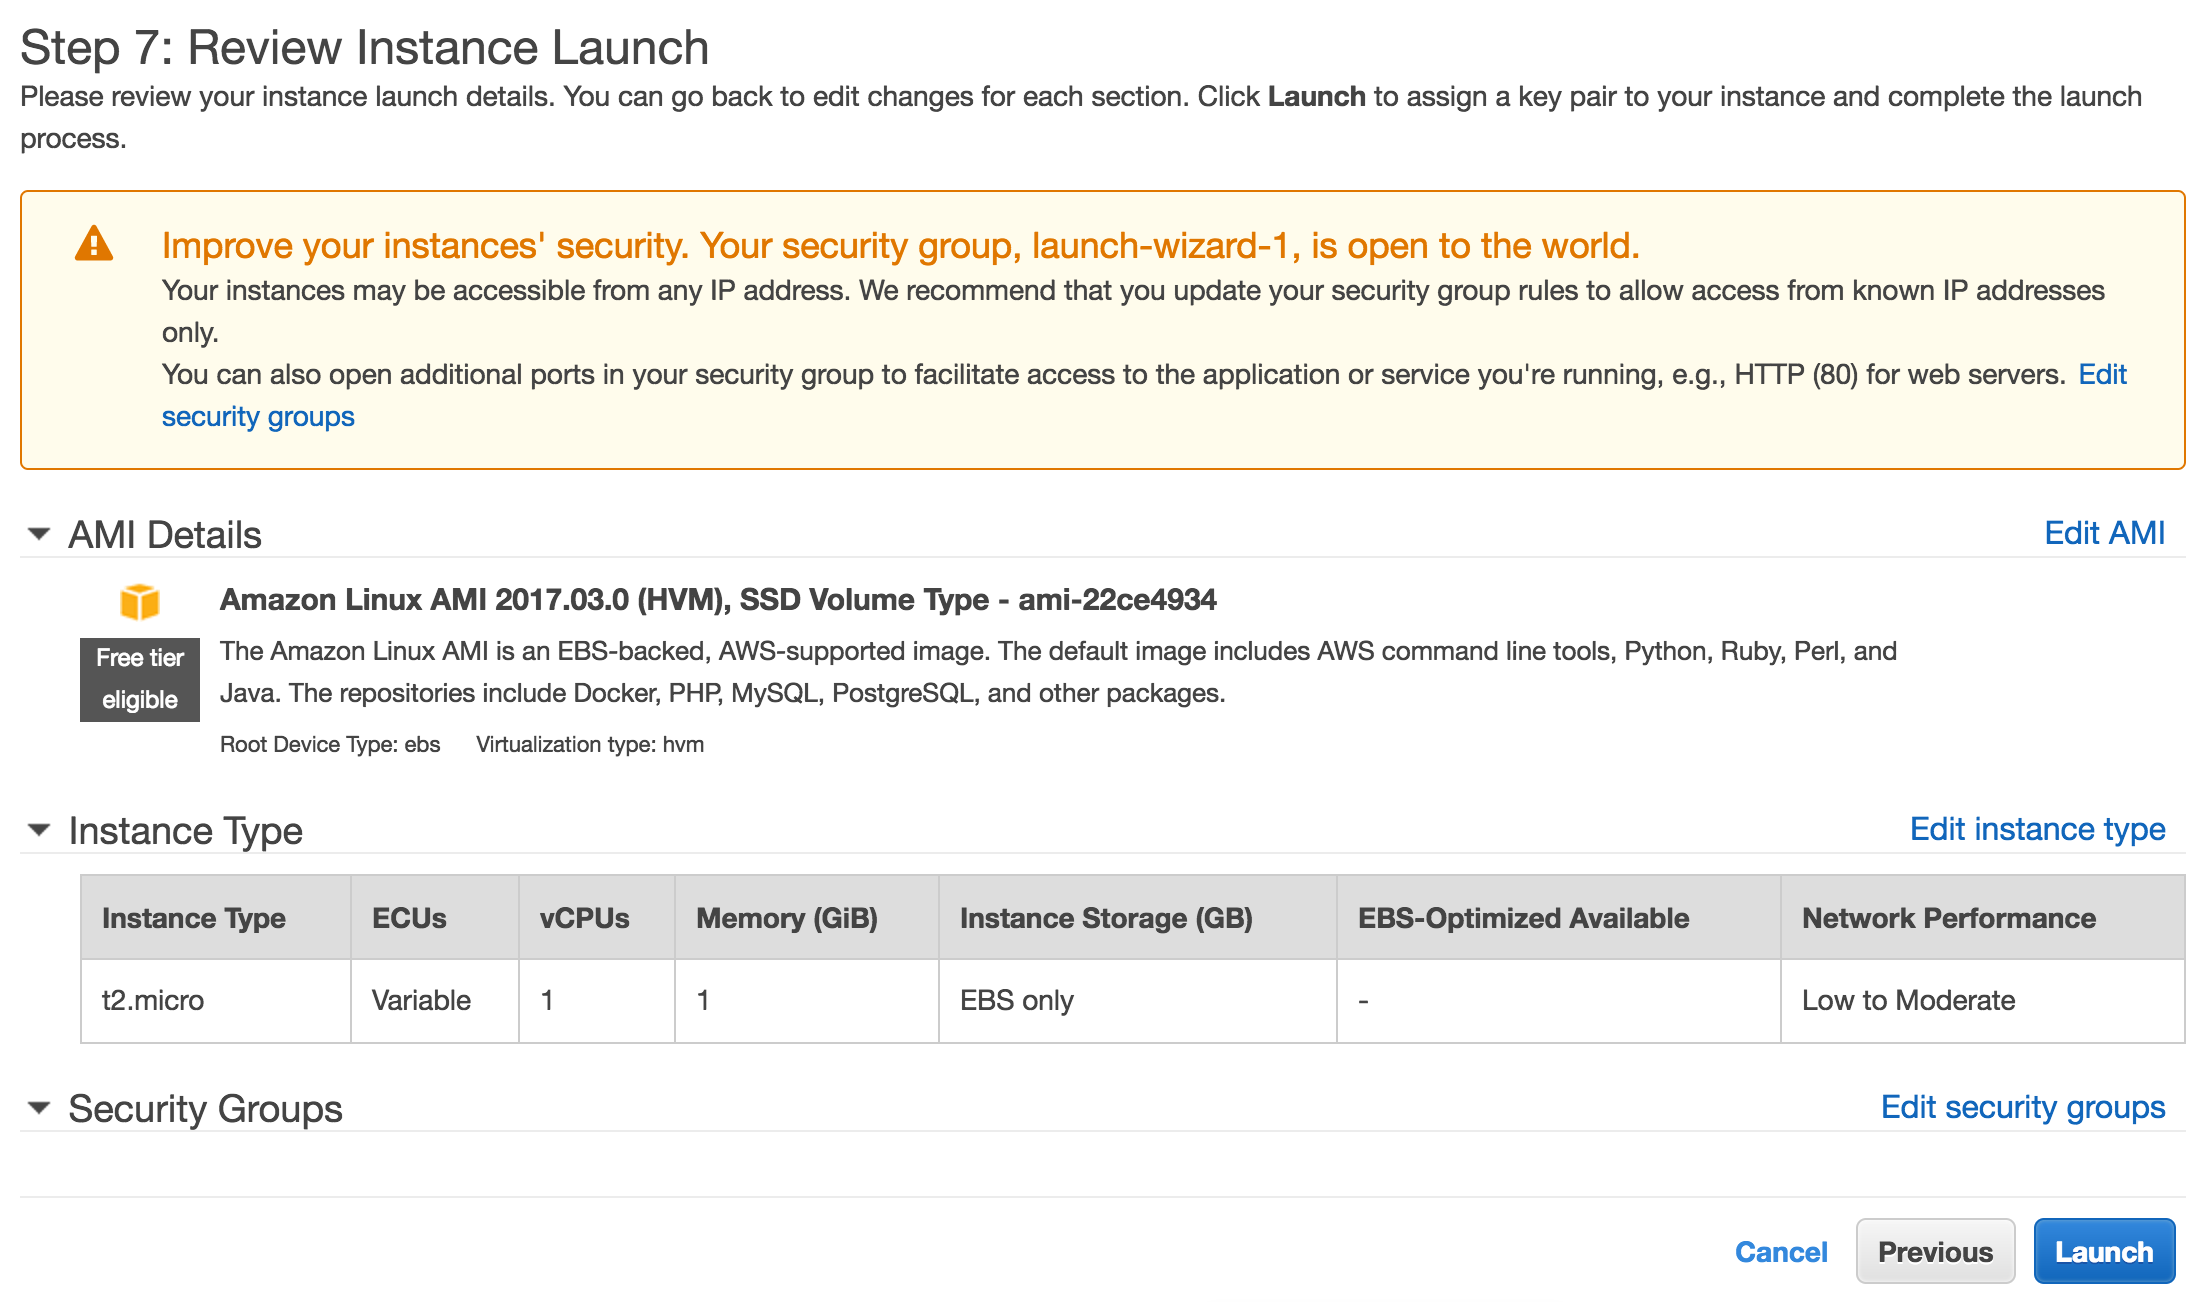
Step 7 - Review your setup
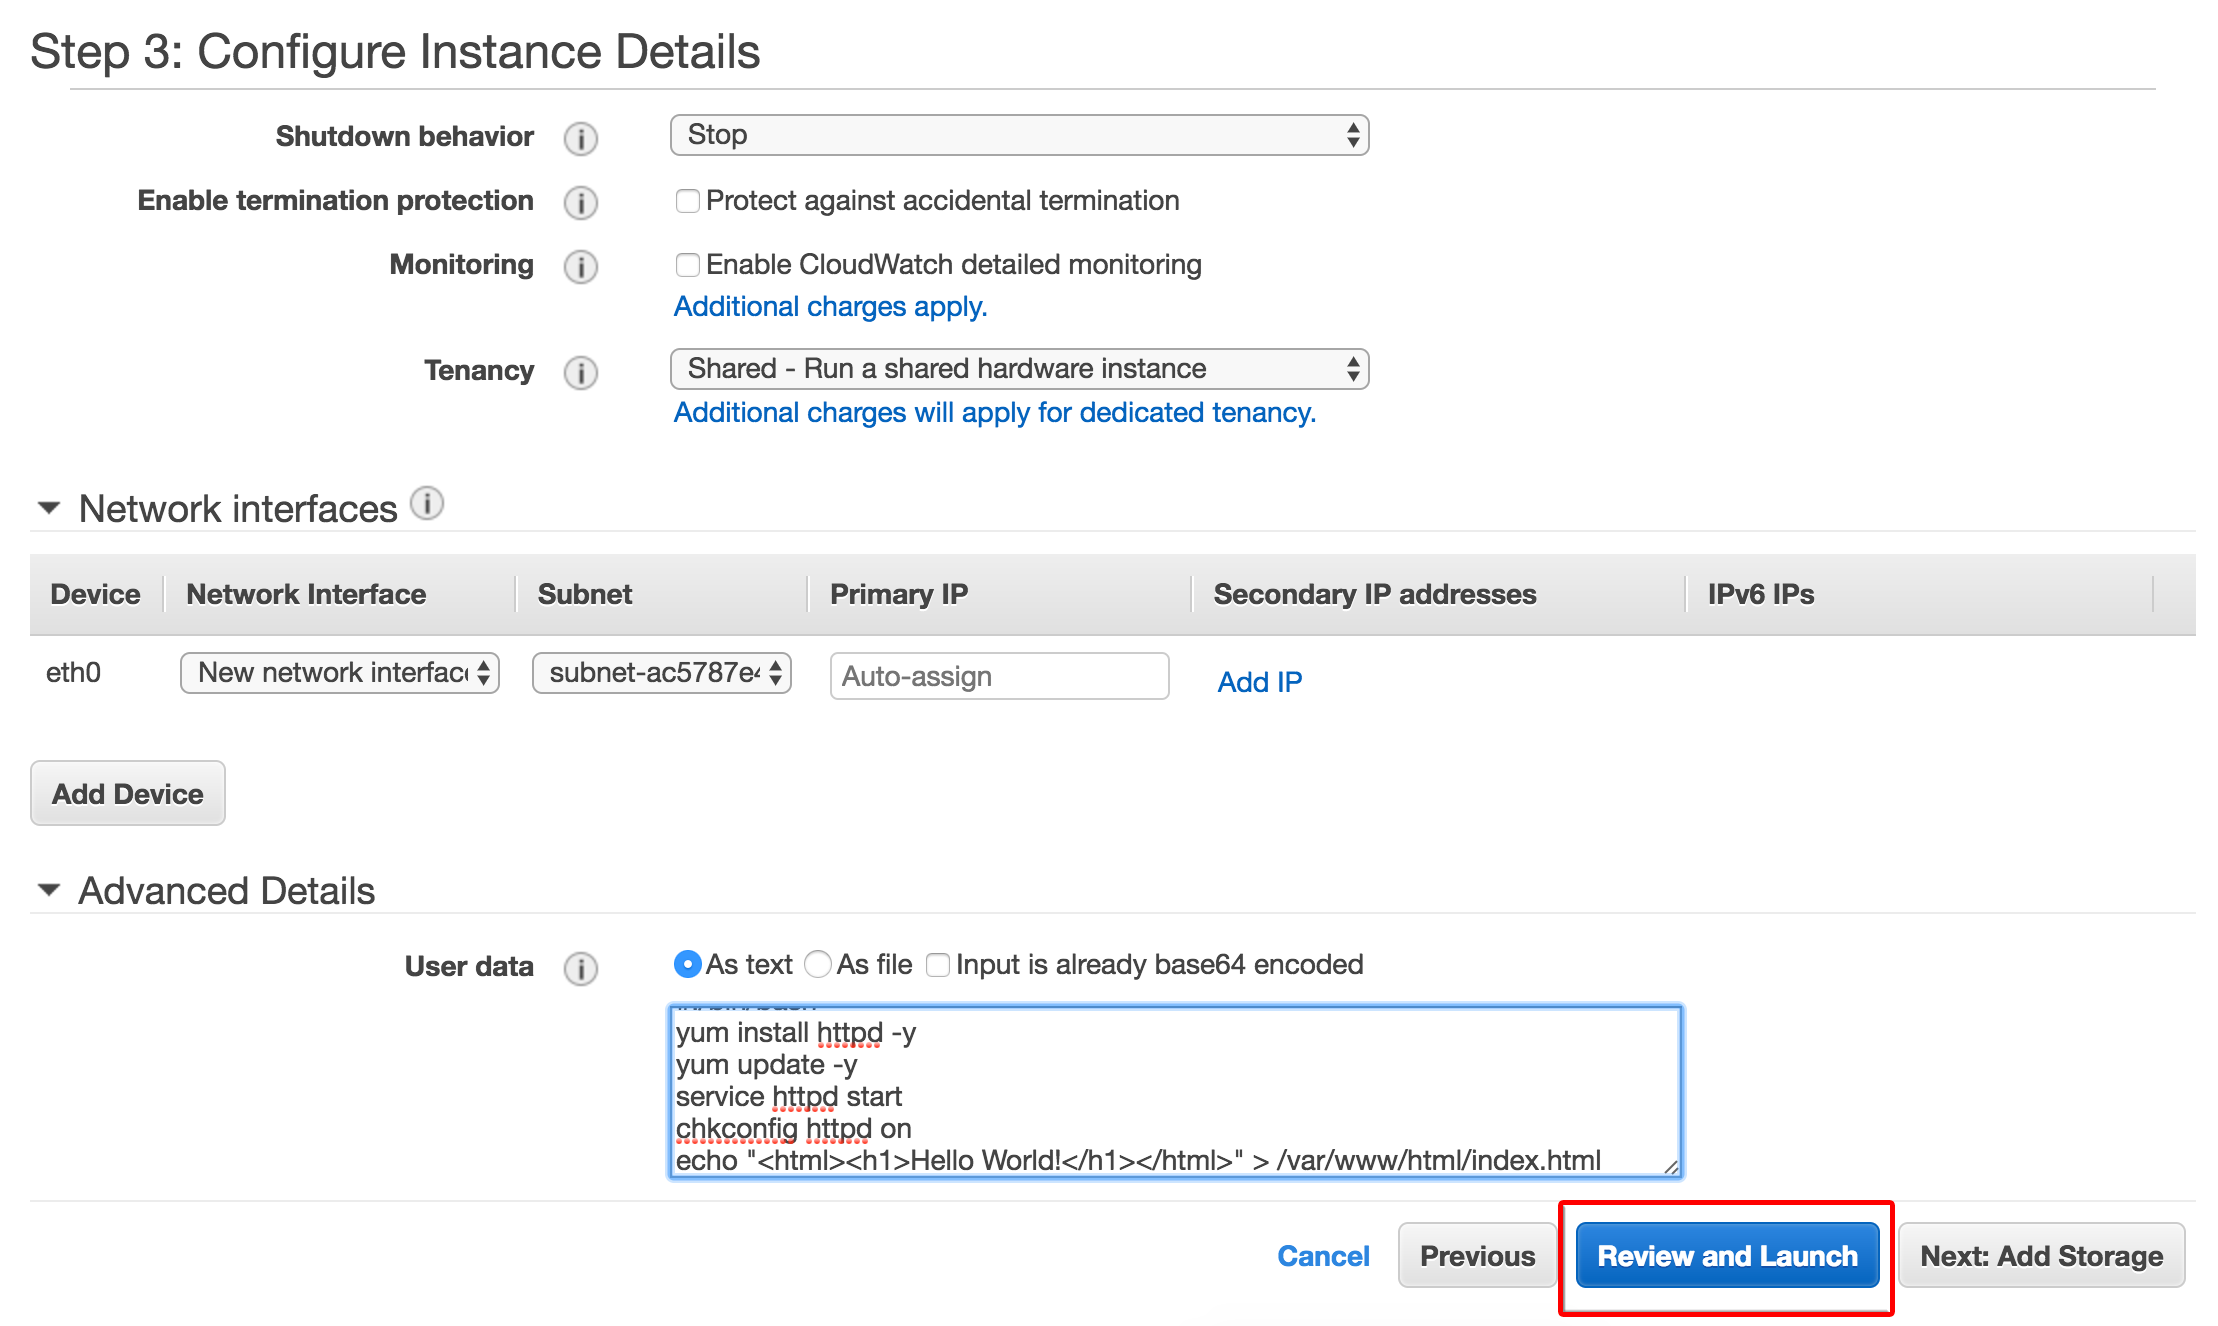
Step 8 - Modify Advanced Details
#!/bin/bash
yum install httpd php php-mysql -y
yum update -y
chkconfig httpd on
service httpd start
echo "<?php phpinfo(); ?>" > /var/www/html/index.php
This script will (in order):
- Install Apache, PHP and PHP MySQL driver.
- Update the operation system with all the latest patches.
- Turn Apache on.
- If the EC2 instance reboots, turn on Apache automatically.
- Create a PHP info file.
Step 9 - Review an instance launch
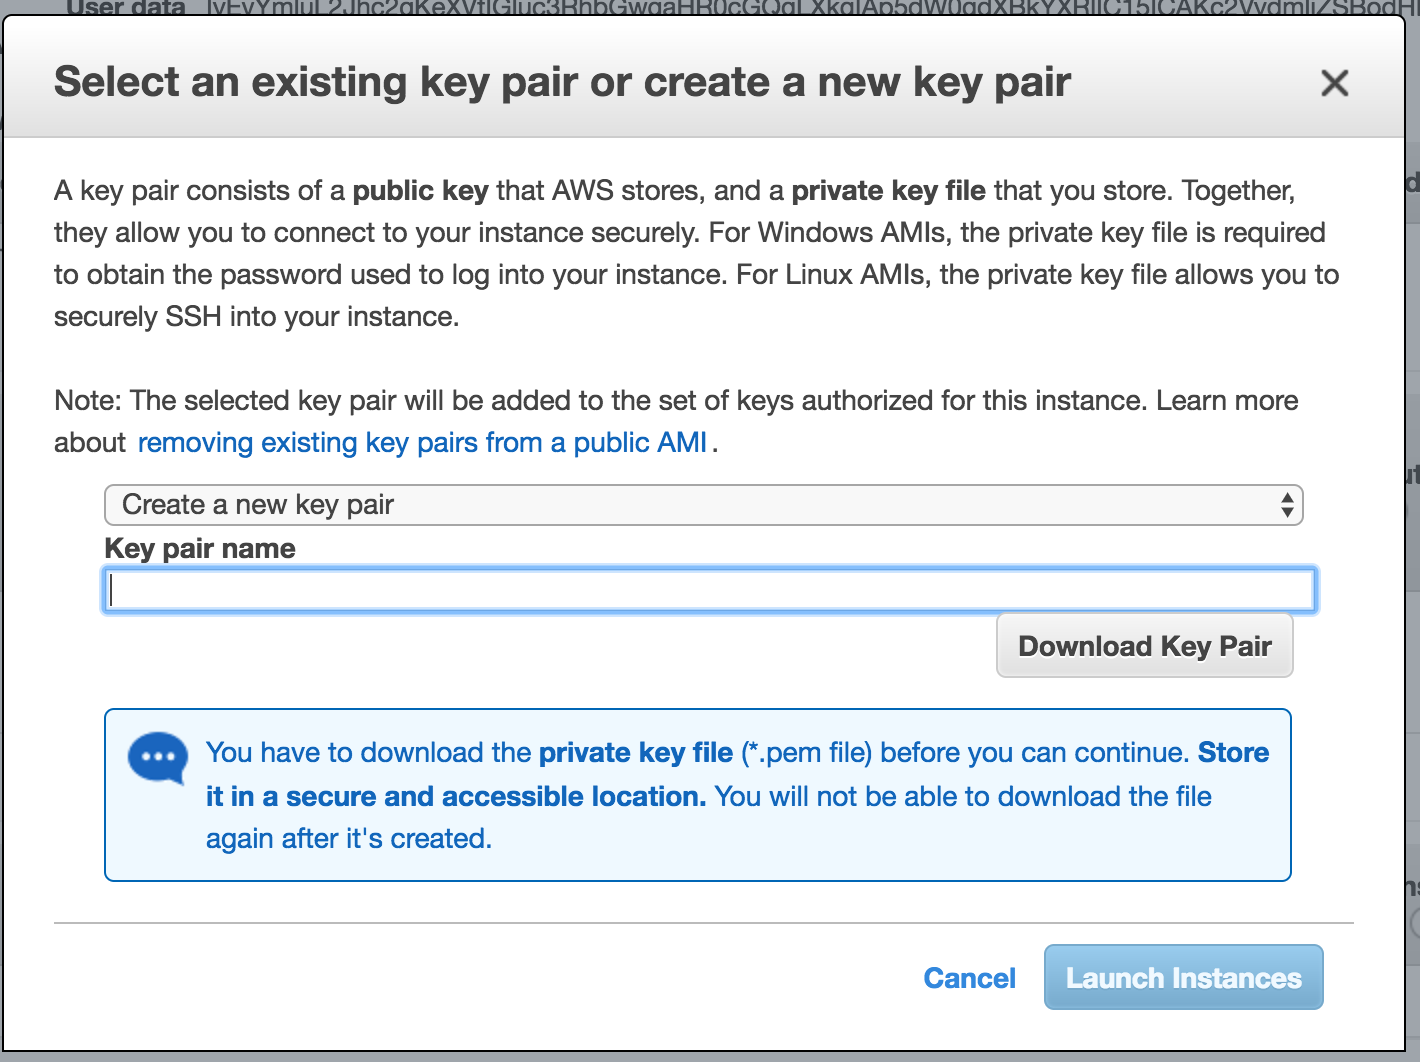
Step 10 - Create a keypair
Get going!
You're done. You've got an EC2 instance running within a public subnet of your newly minted Virtual Private Cloud.


