Developing a serverless architecture (using NodeJS and AWS Lambda) is both messy and tricky to test. Each function works alongside an array of files including package.json, /node_modules, and yarn.lock. Testing often requires you need to toggle between something like run-local-lambda and CloudWatch. To show even more headache, here's a sample of all the npm run scripts you may need to write to make the most out of the command line.

A Web Framework for Serverless
Serverless solves most of these issues I describe above by delivering a web framework for serverless apps. Similar to Ruby on Rails or Django, Serverless is a command-line tool that provides scaffolding, workflow automation and best practices for developing and deploying your serverless architecture.
Best of all, Serverless is cloud-platform agnostic. You can build your app on AWS, Google Cloud, Azure or even Apache OpenWhisk.
If you're ready to create your first scaffold function, let's get started.
Step 0 - Setting Up Your Environment
Before we can start working with Serverless, we'll need to first install brew, awscli and npm.
- Homebrew Package Manager to help you later install AWS Command Line.
- AWS Command Line
- Node + Node Package Manager
Step 1 - Install the Serverless Framework
Installing the Serverless framework is pretty self-explanatory. Using the -g flag, I am installing the package globally on my Mac.
npm i -g serverless
Step 2 - Create a Function
I've provided two different ways to create your first serverless function. The first method is using the out-of-the-box Serverless template. The second is for purists who want straightforwardness.
Method 1 - Using the Serverless Template
This command will show you the power behind Serverless, but when you're first starting, I think the yml file generated is a bit much. Therefore, check out Method 2 for a simple example.
serverless create --template aws-nodejs
Method 2 - Simplest Possible Example
Create a file named serverless.yml and paste this below. This file is your configuration file that will be used to generate a CloudFormation and package.json file later automatically.
# Name of Your Function
service: helloworld

frameworkVersion: ">=1.8.0 <2.0.0"

# Cloud Provider Info
provider:
  name: aws
  runtime: nodejs8.10
  stage: dev
  region: us-east-1
  profile: # Read More Here => https://www.chrisjmendez.com/2017/01/01/aws-working-with-aws-client/

# Function Information
functions:
  hello:
    handler: handler.greet
Create a file name handler.js and paste this below.
'use strict';

module.exports.greet = (event, context, callback) => {
    let data = event;
    callback(null, {
        message: data
    });
}
Take note that serverless.yml expects to see a file named handler.js with a function titled greet for things to work out well.
I also prefer to place my AWS Identity Access Keys in a profile instead of within the yaml file. If you want to learn how to make your own AWS profile, read this article
Step 3 - Deploy
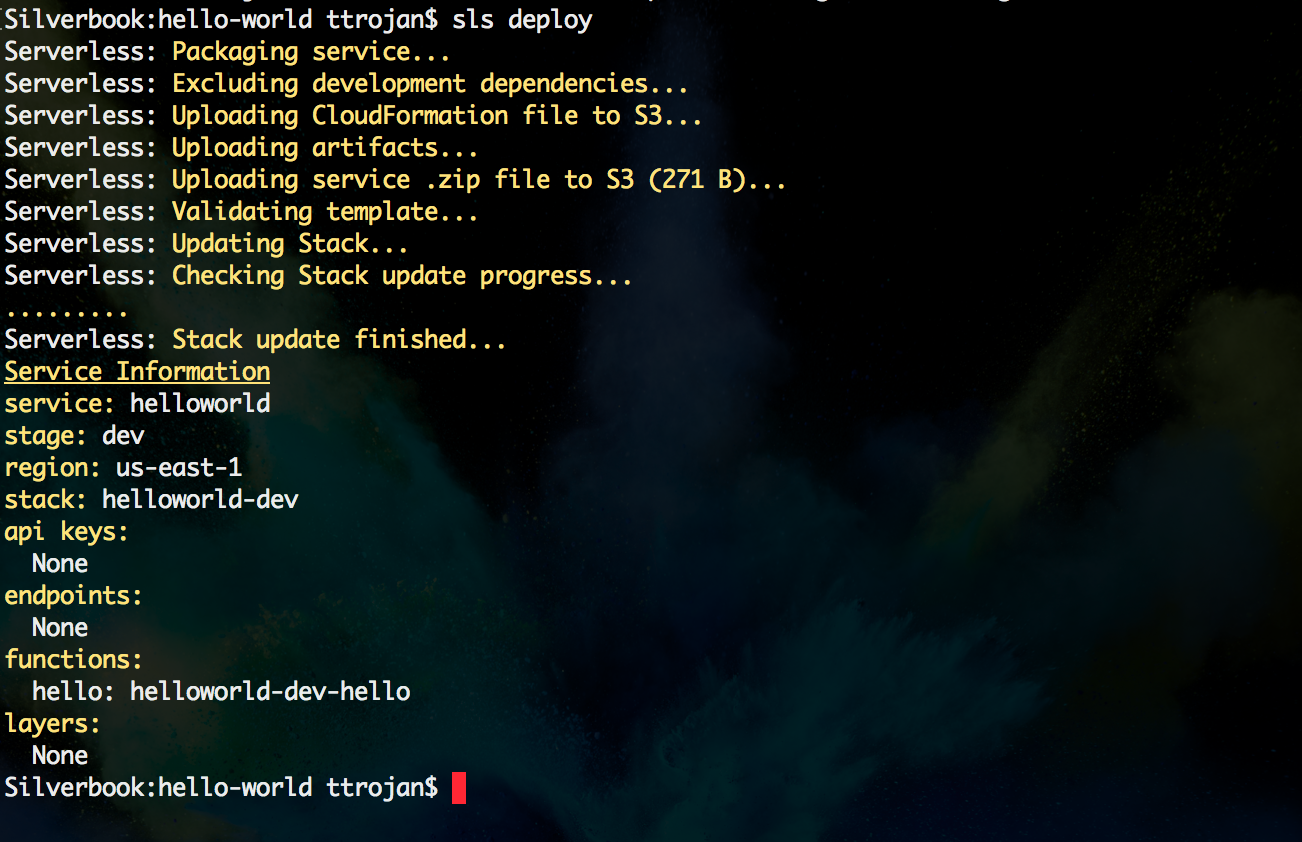
serverless deploy
If things go well, here's what you'll see.

Underneath The Hood
If you're curious to understand what's happening underneath the hood, Serverless Framework is creating a hidden folder with CloudFormation files that automate the delivery if your lambda function. This folder includes:
- Archiving the files using
zip. - Uploading the files to an S3 bucket.
- Publishing from S3 to Lambda.

Step 4 - Run and Log Your Function
This command will run the function and print out a log of the result.
serverless invoke --function hello --data 'Example Data 01' --log
Here's the response.

Step 5 - Check Your Work!
If you want to see where your functions are deployed, use the info command.
serverless info


